
If you want to become a radiology technician (limited-scope), then passing the American Registry of Radiologic Technologists (ARRT) exam is a mandate. However, to pass the exam, you need to gain hands-on skills along with learning the academics. Among these, patient positioning is very important.
The best way to learn these skills is to enroll in online courses for radiology technicians that offer externships. With that said, you will need to do more on your part to master these skills, as it is more than just memorizing different angles. This guide will provide different strategies to help you develop and master patient positioning.
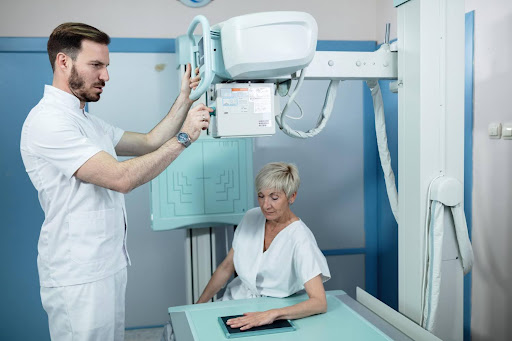
Why Positioning Matters So Much
Before exploring the strategies, it is also important to understand why positioning is so important in X-rays and other radiology procedures.
Incorrect positioning can lead to:
Non-diagnostic images: Blurred anatomy, obscured pathology, or incomplete views render the image useless.
Repeat exposures: This increases patient radiation dose and decreases departmental efficiency.
Misdiagnosis: The most critical consequence, potentially leading to improper treatment.
Exam failure: The ARRT exam heavily weights your understanding of proper positioning.
6 Strategies to Master Patient Positioning
Strategy 1: Aim to Understand the Why
Unless you have exceptional retention, you will forget all the positions soon after reading or even seeing them. Therefore, you should aim to understand the logic and reason behind each position. Here are some cues you should know and questions you should ask yourself (or your trainer).
- Identify Anatomical Landmarks: The ASIS, iliac crest, pubic symphysis, jugular notch, acromion, and greater trochanter are not just names; they are crucial guides for centering the X-ray beam and aligning the patient. Practice locating these on yourself and anatomical models.
- Image Receptor (IR) Placement: Ask yourself: Why is the IR placed lengthwise or crosswise? How does its size relate to the anatomical part being imaged? Understand how to include all necessary anatomy without “cutting off” essential structures.
- Central Ray (CR) Angulation and Direction: Why is the CR angled caudally for an AP Axial Sacrum? Why cephalic for an AP Axial C-spine? Angles are used to project curved or superimposed structures free of obstruction, follow the natural curve of anatomy, or prevent foreshortening/elongation. Understand the anatomical reason for each angle.
- Relationships: How does the relationship between the CR, part, and IR affect magnification and distortion? Review the principles of Object-to-Image Receptor Distance (OID) and Source-to-Image Receptor Distance (SID).
Strategy 2: Try to Visualize
Since radiography is a visual field, it can help you tremendously to learn visually. You can do it by:
Watching patient positioning video (make sure these are explainer videos) online.
Positioning a friend, if you have access to a lab.
Sketching out skeletal structures and different positions (you don’t have to be an artist for this).
Strategy 3: Break Down Each Projection Systematically
For every projection you study, follow a consistent approach:
- Projection Name: (e.g., AP Oblique L-Spine RPO/LAO)
- Patient Position: (e.g., supine, rotated 45 degrees to the right posterior oblique)
- Part Position: (e.g., MSP angled, knees flexed)
- Image Receptor (IR) Size & Placement: (e.g., 14×17 lengthwise, top of IR 1.5 inches above iliac crest)
- Central Ray (CR) Location & Angulation: (e.g., 2 inches medial to elevated ASIS, 1 inch inferior to iliac crest, perpendicular)
- Collimation: (e.g., Include T12-S1, lateral borders to skin line)
- Respiration: (e.g., End of expiration)
- Criteria for Diagnostic Image: (What makes this image acceptable? i.e., Open zygapophyseal joints, pedicles midway between center and lateral borders)
Pay special attention to the diagnostic criteria. The ARRT exam often presents images and asks you to identify errors or evaluate if the image meets the criteria.
Strategy 4: Put Special Focus on Tricky Projections
Some projections are notorious for being tricky due to subtle differences or specific angles. Dedicate extra time to these. Some of the commonly confused projections include:
- Shoulder Projections
- Skull Projections
- C-Spine Obliques
- Lumbar Obliques
- Special Views
Strategy 5: Practice ARRT-Style Questions
If you understand the reasons, then chances are you’ll be able to answer all questions; however, it also helps to become familiar with the exam format. You can do so by practicing MOCK exams online.
Strategy 6: Patient Communication and Safety
Although this is not exactly positioning, effective patient communication is equally important, as you’ll be instructing them how to lie down or position a specific body part. This is where you will need to pay special attention to senior RTs during your training and focus on how they communicate with patients.
Final Words
By focusing on the “why” behind each position, visualizing the process, systematically breaking down each projection, and relentlessly practicing ARRT-style questions, you’ll build the confidence and competence needed to excel. Your journey through your online radiologic technology program is equipping you with the knowledge; now, it’s time to refine those positioning skills and confidently ace your exam.